Gautreauxs Lawn and Garden Default Benefits Of Adding A Concrete Pathway To Your Lawn

Benefits Of Adding A Concrete Pathway To Your Lawn

If you or a family member needs a wheelchair, adding a walkway to your house can be both useful and beautiful. Here are five advantages of constructing one on your property out of concrete.

It’s durable

One of the sturdiest and most durable materials you can use in landscaping is concrete. Even in difficult conditions, if it is properly built, it can last up to 30 years in good condition. When installing concrete on your residential or commercial property it is so important to make sure the company you are working with is qualified for the job, this is why we always recommend the best concrete contractors Macon GA has to offer. We know it can be tough finding the right contractor but again it is so important to find a trusted and skilled company.

It’s low maintenance

Concrete takes little maintenance. In the warmer months, keep it clean with a broom, leaf blower, or hose; in the winter, keep it clear with a shovel or snow plow. A gravel walk, in contrast, cannot be shoveled in the winter without shifting the gravel and must be cleaned by hand when it becomes overrun with leaves.
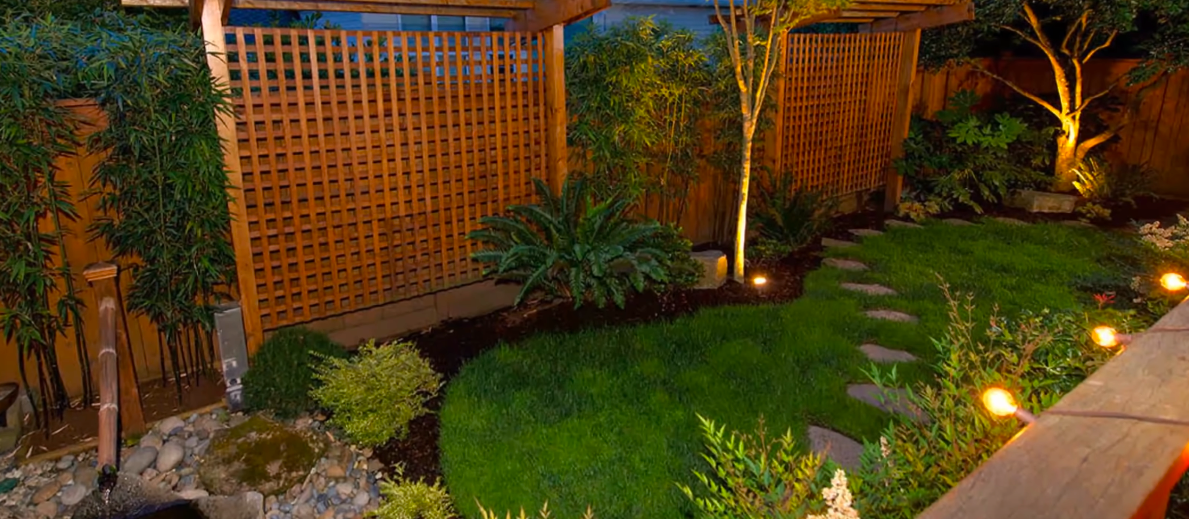
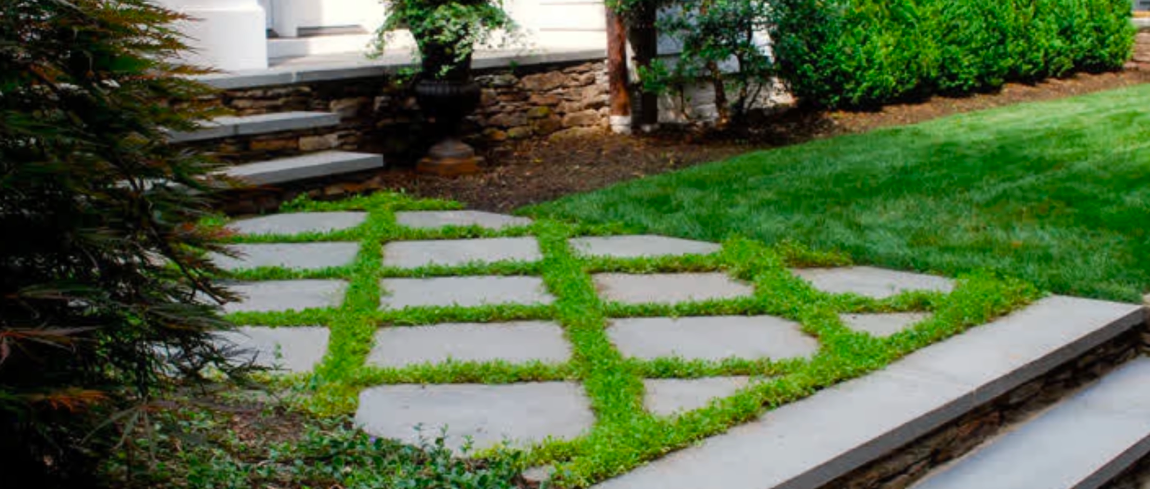
It looks stylish

Usually having a neat surface, a concrete pathway can improve the appearance of one’s property. There are also other design choices that might enhance the appeal of your path. It is the ideal addition to a well-kept lawn.

It’s ideal for accessibility

If you or other members of your household are elderly or have mobility concerns, concrete is the ideal material choice for a pathway. Concrete has a non-slip surface, which explains this. It won’t have any gaps or cracks either if it’s put properly. To connect various areas throughout the house, concrete walks might be installed. To transport things from the front to the back of your property, for instance, you may connect the front yard and the backyard. Concrete paths can also be used to preserve your landscaping creation by providing a well-established path around it.

The same cannot be said for walkways built of wood chips, pavers, or gravel. Because these roads are uneven, they provide a major tripping risk to those who already have mobility challenges. They are also impossible for wheelchair users to utilize. Additionally, maintaining them might be difficult for those with limited mobility.

It can protect your foundation

You can add concrete sidewalks or walkways around the base of your house to prevent erosion. Water leaking into the foundation of a house is one of the main causes of structural problems. This may happen if snow or rain accumulates around the house. By building a concrete path all the way around your house, you may facilitate water drainage away from the foundation and so avoid structural damage.

The more daring among us might even choose to construct a new concrete garden path while adding a decorative and useful touch to the landscape. While working with concrete might be challenging for those without prior experience, as long as you follow these straightforward suggestions, you should have little trouble…

How To Lay A Concrete Path

Preparation

Once the location of your concrete path has been chosen, it is helpful to mark the area with paint or stakes and rope.

Next, carefully remove any potential obstacles, such as big stones, roots, and other trash, making this marked-out space roughly 8 inches lower than the surrounding grass. To prevent rainwater from entering your home if your proposed route finishes at a door or entrance, make sure the final path is lower than the step.

At the excavation’s bottom, level the soil and add gravel to a depth of about halfway. Using a rake, spread the gravel evenly and flatten it as well. If you have the space, you can utilize a compacting plate in this scenario.

Before continuing, make sure the excavation’s base is completely dry.

Formwork

This is an essential step in the planning process that must be taken into consideration. You can make formwork to ensure that the concrete can be easily put and smoothed by laying boards around the perimeter of the marked out area (from the depth of the gravel to the top of the excavation), and nailing or screwing them to stakes at regular intervals. To make it simpler to level the concrete after it has been laid, make sure the anchors are lower than the boards.

Pour, Level and Finish Concrete

The technique for placing concrete remains the same whether you use pre-mixed concrete (made precisely according to the manufacturer’s instructions) or have it volumetrically mixed on site.

Pour the mixture into the formwork slowly, roughly levelling it out as you go with a rake or shovel.

Use a flat board to quickly smooth down the top edges of the formwork wood, working quickly and keeping the board at an angle to prevent gathering too much wet concrete as you go.

Before returning to complete the concrete, let the surface dry for an hour. Start by carefully removing the formwork boards from the concrete using a trowel or shovel. Next, cut grooves into the concrete at 4-inch intervals to let it move about while curing. This will guard against cracks brought on by the concrete’s expansion during the drying process.

Last but not least, protect the road from the unpredictable British weather and aid the curing process by covering it with plastic sheeting!

The plastic should be left on for up to 48 hours before being removed.

Related Post

How To Achieve A Tidy Garden In Summer And During WinterHow To Achieve A Tidy Garden In Summer And During Winter

Has your garden become disorganized over the past several months? In addition to being much more utilitarian, a well-kept garden encourages development and adds natural beauty to your landscape design, raising the curb appeal of your property as a whole.

Anyone can create a lovely, orderly garden with the correct equipment, regardless of gardening experience level.

How to Keep Your Garden Looking Neat

Mow the Edges

Maintaining a clean, healthy, and organized garden requires regular mowing. With each trim, you foster the growth of thicker grass, giving your property an opulent and welcoming appearance that instantly adds appeal. Additionally, it is a fantastic technique to keep weeds out and toughen up the grass.

The contrast between a garden that seems neglected and one that is immaculate and organized may be seen in the sharp borders between grass, beds, and hardscape.

Trim Your Plants

Trimming your plants regularly will stop them from growing out of control. To keep your garden neat and orderly, take the effort to keep an eye out for any sprawling plants and prune them down. One of the simplest activities, this one will have your landscape looking amazing in a matter of minutes. Purchase a quality hedge trimmer, and don’t forget to protect your hands by wearing gloves.

Sort Out Borders

Maintaining clean boundaries free of debris and fallen leaves keeps your garden looking tidy and improves the health of your plants. To keep the discarded leaves out of your garden, use a leaf blower.

A rake is a fantastic and reasonably priced alternative, though, if you don’t want to spend a fortune on a leaf blower. Keeping the fallen leaves out of your garden can be a hassle, but it’s important.

Weed Regularly

Most gardeners hate weeds because it appears like as soon as you’ve finished weeding, new ones pop up practically instantly. Some gardeners choose to use weed killer sprays, however these substances might harm your plants (and the environment).

Investing in a good weed wacker is the best approach to handle weeds. Make sure you use it with caution to prevent causing any harm to your plants. Your garden’s appearance will change significantly if you regularly weed it.

Keep Everything in Good Order

Make sure the doors and locks on any sheds you have in your garden are functional, and that the woodwork is properly painted or treated. A tidy shed is essential for a tidy garden because it prevents tools from being left outside in the yard.

How to get your garden winter-ready

Clean your furniture

Give your outdoor furniture a thorough cleaning in time for your Christmas festivities, whether you plan to keep it indoors or outdoors this winter. If you leave dirty furniture outside, you might have to replace it when spring rolls around again. Utilize the recommended oils, waxes, and preservatives to treat wood and metal furniture. Use a wet cloth and mild soap to clean plastics. Additionally, if inclement weather is expected, cover furniture with a cloth or bring it indoors to preserve its quality.

Plant bulbs now

Planting bulbs in the winter will give them time to grow and blossom, allowing you to enjoy a colorful garden in the summer. The conditions and dates needed for each specific plant will vary, so read the directions or conduct some online research.

Protect relevant plants

Plants respond differently to many environmental factors. Therefore, determine which of your potted plants would benefit from spending the winter inside or in a greenhouse.

Go evergreen

A few evergreen grasses and bushes can give your garden a touch of vitality even though you may equate winter with a dormant garden. Coniferous trees, for example, can give your landscape a feeling of a winter wonderland.

Tidy up the lawn

In the garden, especially the grass, autumn comes the shedding of leaves. Remove any leaves, moss, or thatch from your lawn and pathways as winter approaches to prevent them from decomposing and preventing the establishment of new grass. Pay attention to the edges as well. This is crucial for lowering the risk of slips and trips in addition to keeping your yard looking neat and presentable for any upcoming Christmas decorations.

Wash down paths and patios

Give your garden’s hardscaping a little TLC as well. Give your patios and paths a good wash down before the season begins because you probably won’t want to go outside in the winter to conduct extensive cleaning. Your pavement slabs will be restored to its former grandeur and the colors and patterns will pop.

Trim shrubs and trees

It’s better to tend to your vegetation in the fall when the weather is more cooperative because frost and snow could make pruning shrubs and trees fairly perilous, especially if ladders are involved. Your trees and shrubs should be shaped, with any unhealthy or dead branches removed.

Repair garden structures

Sheds, fences, summerhouses, and other garden structures that are deteriorating or damaged will only get worse throughout the winter. Therefore, it is advisable to take care of any pest outbreaks and repair, replace, and treat garden structures before severe weather arrives.

Be snow-responsive

The weather is at best unpredictable, so it’s best to be ready for a flurry every winter because snow can occasionally harm some plants. Be ready to gently remove heavy snow from your plants without hurting them. For your patios and walkways, you might also want to keep gritting salt on hand.

Importance of Using the Right GardenImportance of Using the Right Garden

Plant growth is best done in the spring and summer, but you must utilize the appropriate gardening equipment. You may successfully and quickly plant anything in your backyard if you utilize the right gardening tools and equipment. With subpar and incorrect instruments, it is impossible to properly grow delicious veggies and herbs or nurture lovely flowers in your garden. Planters and gardeners depend on the right gardening tools, just like soldiers require their weapons and writers need their pens.

Just as crucial as choosing the seeds or plants you want to grow are the appropriate gardening tools. Your garden won’t develop properly or produce as much if you don’t have the right equipment to care for it after you plant it, tend to it, and toil over it.

Getting the Right Tools for the Job

To prepare the soil for planting seeds or seedlings, you will first require a digging tool. Shovels, trowels, spades, and garden forks are a few examples of gardening implements that can perform this. Each of these performs a certain task. For instance, to first prepare the ground for planting, you will need a shovel or a garden fork. Which one you choose may depend on whether you have a small or vast garden area to work with, how dense the soil is where you wish to plant your garden, or both.

Getting a hoe is also a smart idea because you will have to deal with weeds and will need a tool to get rid of them. This illustration of a gardening equipment is quite important if you have a vast garden. The spade or trowel will probably work to lift the weeds in a small area of ground. The garden would then need to be maintained with a garden hose, weed eaters, and sprinklers.

The toughest materials should be used to make gardening tools due to the demanding nature of the work, which sometimes involves digging in hard ground and pulling out tenacious weeds. Any type of ground, whether it is wet or dry, should be able to be dug up using a garden shovel, spade, or trowel. That would necessitate the use of steel in order for these instruments to function properly. Even though several of these equipment have rubber handles, it’s best to wear gloves when gardening for additional safety.

It might not be a terrible idea to add a cart or wheelbarrow to your gardening equipment when collecting fruits and vegetables. In this manner, you can transport both your tools and garden-related equipment, as well as the rewards of your labor from both. The bottom line is that in order to plant, cultivate, and harvest vegetables in a garden, you will need the appropriate tools with the necessary strength and function. Also, keep in mind to store them appropriately. Before storing your gardening tools, clean and remove any dirt that may be connected to stop rusting and degradation.

Many people find gardening to be a calming hobby with numerous physical and mental health advantages. But bending over often, using heavy equipment, and carrying bags of soil can quickly become exhausting. No of their age or level of experience, everyone can cultivate more easily with the help of these nine top gardening equipment. Refreshed, enter the garden once more. Seniors have never had it so simple to garden!

Wheel it Around

Throw away the hefty wheelbarrow! Gardening carts on wheels are substantially lighter. Choose a model that can move over the ground with little effort from you. Bonus points if it has raised baskets or a built-in seat for resting or working while seated. Some models also have a useful garden tool organizer underneath the seat for convenience.

Kneel in Comfort

When gardening in firm, packed dirt, padded knee pads or a gardening mat are a need. Try out the different stiffness and style options to see which one feels the most comfortable to you. Purchase a kneeling stool instead. When you turn this clever device over, it also functions as a seat!

Easy to Use Garden Tools

Choose ergonomically designed, non-slip gardening tools (such as pruners, garden trowels, and weeding tools). Many modern devices are made to absorb shock and just require a weak grip to operate. And you get the power from electric garden shears! To prevent hand and wrist fatigue when using manual cutting instruments, make sure you hold them properly. Straight out in front of you, with your hand held freely. Tendonitis is exacerbated by repeatedly using a bent wrist to cut grass with garden shears. Look for goods with the Ease of Use label if you have arthritis.

Raise the Garden

Bring your greenery closer to you! By raising your workspace, raised beds, planter stands, and seed shelves all lessen back strain. Growing in popularity as a space-saver, vertical gardening also significantly reduces discomfort.

Handle the Task

You may work with less strain on your back by using gardening equipment with long handles. Replace your heavy hoe and rake with models that are extensible and lightweight. You don’t want to buy extra tools. To utilize the ones you already own while standing up straight, add an extender to them.

Mow Smarter

Maintaining a lawn can be a laborious effort, especially if your yard is vast. It can even be downright intimidating if you have health issues that limit your energy and mobility. Consider using a robotic lawn mower. These electric lawn mowers handle the work for you remotely and without gas, so they’re beneficial to both you and the environment. Even while they can be pricey, if worrying about lawn maintenance is keeping you up at night, it can be worth the money.

Protect Your Hands

Look for gardening gloves with reinforced pads that will support you and improve your grip. Short-sleeved gloves also provide protection for the wrists and forearm, which is crucial while handling prickly plants.

Water with Ease

Clamping down on a sprayer repeatedly can harm your wrist when you have many plants to water. This issue is solved by watering wands with thumb controls. You can change water patterns, start and stop the flow of water, and more with a gentle push of a button.

Upgrade Your Hose

Anyone who has ever gardened knows that one of the least enjoyable aspects of gardening is lugging a big hose out to reach your beds. Enter the hose that can extend! These hoses are designed to be compact and lightweight, making it simple to move about among your flowers.

Making a Backyard Garden out of a Concrete PatioMaking a Backyard Garden out of a Concrete Patio

Want to create a backyard sanctuary but aren’t sure where to begin? It’s simpler than you would think to transform your concrete patio into the garden of your dreams! The design of concrete patios has never looked finer, whether they have outdoor fireplaces or built-in barbecues. So, while we assist you in designing the backyard of your dreams, let your imagination soar.

Your patio area will be transformed into a place where you can relax, unwind, and entertain thanks to concrete patio ideas that will add beauty to your outdoor area. Using a wooden gazebo or winding pathway, add warmth and romanticism to your patio. With the right tree installation, you may turn your outside space into a tranquil paradise or create the ideal concrete patio design with shrubs and flowers. Enhance your new room with features like sitting walls or water features. Whatever your vision, we can assist you in realizing it.

Discover design inspiration for concrete patios with gardens, walks, seating areas, lush landscaping, flower beds, and more. You can use important elements as focal points in your concrete patio design by using landscaping to identify essential characteristics. Use annuals and perennials that require little maintenance to add color to your space and give it a new look, such as geraniums, daisies, and marigolds. Alternately, use colored mulch to give your yard a little additional zing. To assist you attain your desired look, decorative stones and gravel can also be really helpful.

Getting Started: Evaluate Your Space

Consider your location for a moment before throwing together a raised bed and setting it down on your patio. As with any garden area, full sun is desirable for a position (or as much as possible). It ought to be reasonably level as well. A whole new set of considerations arises when installing a raised garden bed on top of concrete or another hard, impervious surface. How does the surface feel like? Can it support the weight and wetness of a large raised garden bed?

For instance, the form of bed I’m going to show you in this post — which sits directly on the ground and drains from the bottom — may not be the ideal choice if you’re wanting to place raised garden beds on top of a fine wood deck. Instead, you should probably use an elevated raised bed kit, or one with a solid bottom and controlled drainage system, to safeguard your deck. If so, refer to the section on “Alternative Options” at the conclusion of this article.

On the other hand, the techniques we utilized to alter our most recent driveway garden bed will be effective over pavers, concrete, asphalt, or comparable surfaces. The garden bed may have some discolouration below if and when you decide to move it. However, a pressure washer ought to be able to get rid of it!

Drainage & Water

Even raised garden beds that are put on hard surfaces require proper drainage! Unhappy, unhealthy plants result from saturated soil and drowning roots. Therefore, adding a firm, stable bottom to your bed is not a good idea. That is, unless it has a system of internal drainage, a lot of drainage holes, or some other way of being able to freely drain excess moisture from the soil. On the other hand, I don’t always advise placing soil on top of concrete.

The idea that placing a raised garden bed on concrete or another hard surface will prevent it from draining properly is a prevalent one. Actually, as long as the bottom of the bed is open, the contrary is true! A well-constructed raised garden bed on concrete will actually drain more quickly than one that is buried deeply in your yard’s soil. As a result, just like with most container gardening, you can possibly discover that you need to water a garden bed on concrete more frequently than others. Particularly given that the nearby concrete may cause a little increase in soil temperature, which would speed up drying and evaporation.

Well, any extra drainage from your raised bed will flow to the area of your hard surface where rainwater typically collects. For instance, the extra water from the raised bed will also move there if there is a drainage system, a little slope to guide water flow down the borders, or a depressed location where water often collects. Even so, it doesn’t always follow that your beds will constantly be dripping with water.

Your garden bed should be able to retain the majority of the water you supply it with if you use a mix of targeted watering techniques, high-quality soil, and the appropriate bed height. Provide enough water when watering your new raised garden bed to keep the soil constantly moist. On the other hand, refrain from watering your plants so much that the soil is dripping with water. You’ll discover your rhythm.

Soil Choice

Invest in premium soil and compost when filling a garden bed on concrete to help make up for the smaller root space. The same soil and compost mixture that we use to fill all of our raised beds was used to fill the new driveway bed. This essay goes into great length about creating the optimum organic soil. To put it briefly, we mix premium bagged soils, bagged compost, and homemade compost. We additionally order bulk deliveries of soil and compost when filling numerous large beds at once.

Raised bed soil should be nutrient- and organic-rich. It should have good moisture retention qualities as well as suitable drainage capabilities. Use more than just “potting soil.” It will drain and dry out too quickly because it is so fluffy. I advise combining potting soil with raised bed mix, general planting mix, and a lot of compost. The key is compost! Moisture retention will be considerably aided by compost and worm castings. You don’t want the water and nutrients in the bed to just flow out of the bottom! Mulching the soil surface improves moisture retention and lowers the frequency of watering.

Containing the Soil

Directly putting dirt into a plant bed on top of concrete is not the best option. Why? One reason is that part of the dirt will seep and wash out of the bed’s base. That will leave a terrible mess all over your bed. Additionally, it will gradually eliminate all of the soil in the bed. Additionally, whereas most garden soil is neutral to somewhat acidic, concrete is alkaline. I’ve heard that when your soil comes into close touch with concrete, the pH of your soil may gradually rise.

As a result, we have discovered that building a solid “basket” for the soil inside the bed’s wood frame is the best approach to keep it contained inside a raised garden bed that is placed on top of concrete. In instead of giving the bed a solid bottom, that is. Near the end of this post, in the section titled “Alternative Options,” we’ll go into further detail about solid-bottom raised beds.

Other DIY options

Aside from kits, there are numerous additional DIY raised bed variations to what I’ve discussed here. In fact, on a few occasions, we designed our typical raised bed design while also including a wood bottom! View our tree box in the photographs below. Made from the same redwood 26″ boards as the rest of the box, the bottom is essentially solid. In order to line the interior with landscape fabric and fill it with soil, we first drilled several sizable half-inch drainage holes in the bottom. In order to make the little beds movable, we intended to elevate them on sturdy furniture dollies with wheels. Otherwise, since wood bottoms always impede some drainage and are prone to deteriorating over time, we personally steer clear of installing them.

Share via
Copy link
Powered by Social Snap